

How to Dowel Rebar into Existing Concrete
Doweling rebar into existing concrete starts with a sound slab and a joint detail that fits the job. Mark the dowel locations, check for hidden rebar and utilities, then drill holes to the specified size and depth. Clean each hole as the adhesive maker directs, inject the approved adhesive, and insert the bar with a slow twist. Let it fully cure before placing or loading the new concrete.
The key question comes before drilling: Should the joint be tied together or allowed to move? Bonded rebar can transfer force across a joint, but it can also restrain shrinkage in the new slab and cause cracks. A joint meant to move needs a different dowel detail.
I’m Jordan Harris, a Tennessee-licensed structural engineer who spent five years working on large concrete and steel projects. I’ll walk through doweling rebar into existing concrete with a focus on sound connections, practical installation, and the joint details that keep new work from cracking.
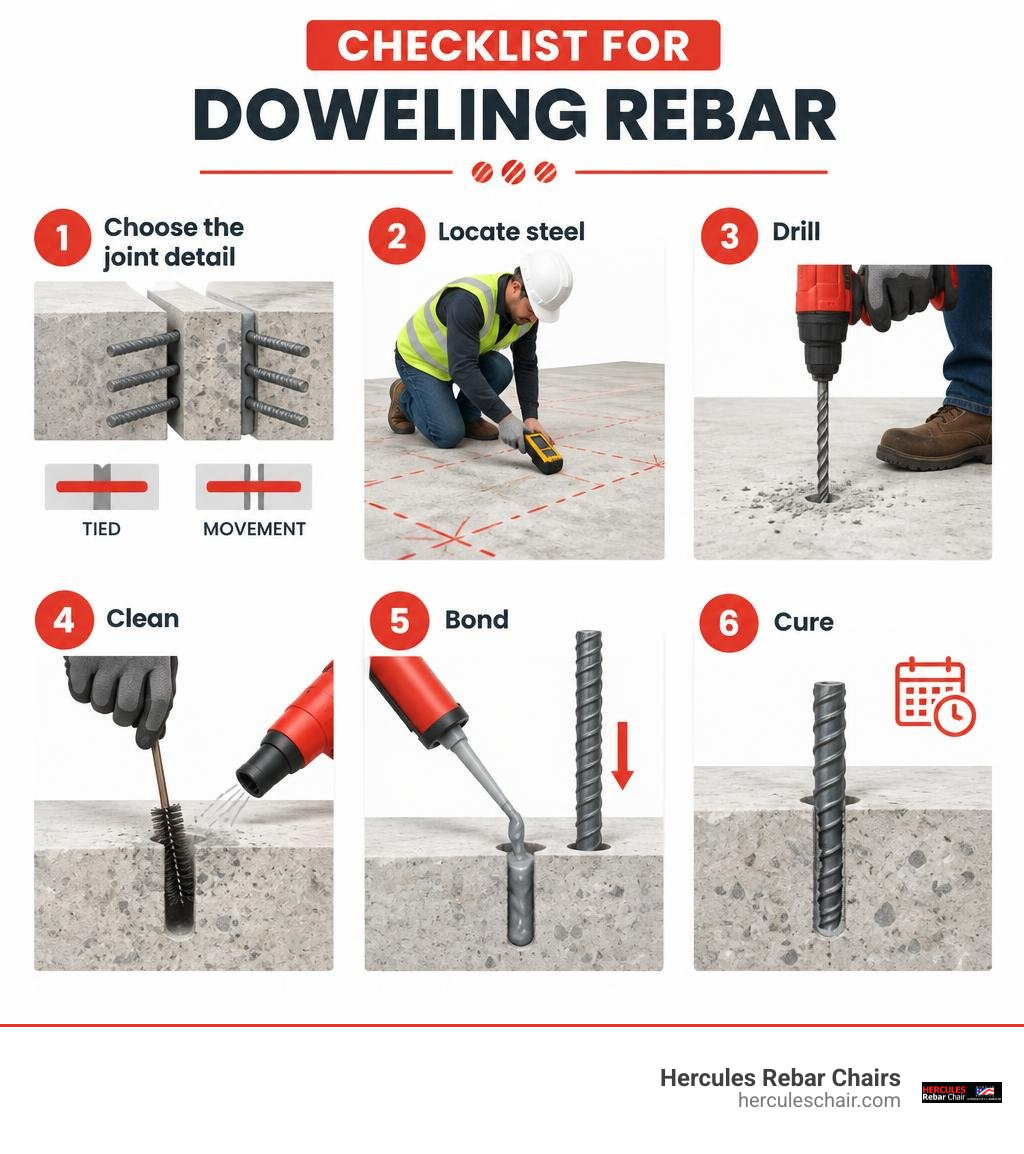
Doweling rebar into existing concrete terminology:
Understanding the Fundamentals of Doweling Rebar into Existing Concrete
Connecting fresh concrete to an established slab or wall creates a cold joint. Without mechanical connection, these two masses act independently under thermal shifts, soil movement, and dynamic live loads. Installing steel dowels bridges this interface to provide dependable shear transfer and, when designed for it, tension resistance across the cold joint.
When we tie concrete elements together, our primary engineering objective is achieving composite structural action. Whether extending an industrial warehouse floor, widening an outdoor driveway, or executing foundation tie-ins for an addition, the dowel transfers vertical shear forces across the joint to keep the slabs level.
Reviewing a comprehensive rebar placement guide before laying out your grid ensures that dowel bars integrate seamlessly with the main reinforcement cages of your new pour.
Why Doweling Rebar into Existing Concrete Prevents Structural Failure
Without dowels, adjacent slabs experience differential settlement. When heavy wheel loads pass over an un-doweled joint, the slab taking the load deflects downward while the unloaded slab stays stationary. Over time, this causes joint faulting—the unsightly and dangerous vertical offset that trips pedestrians and ruins forklift tires.
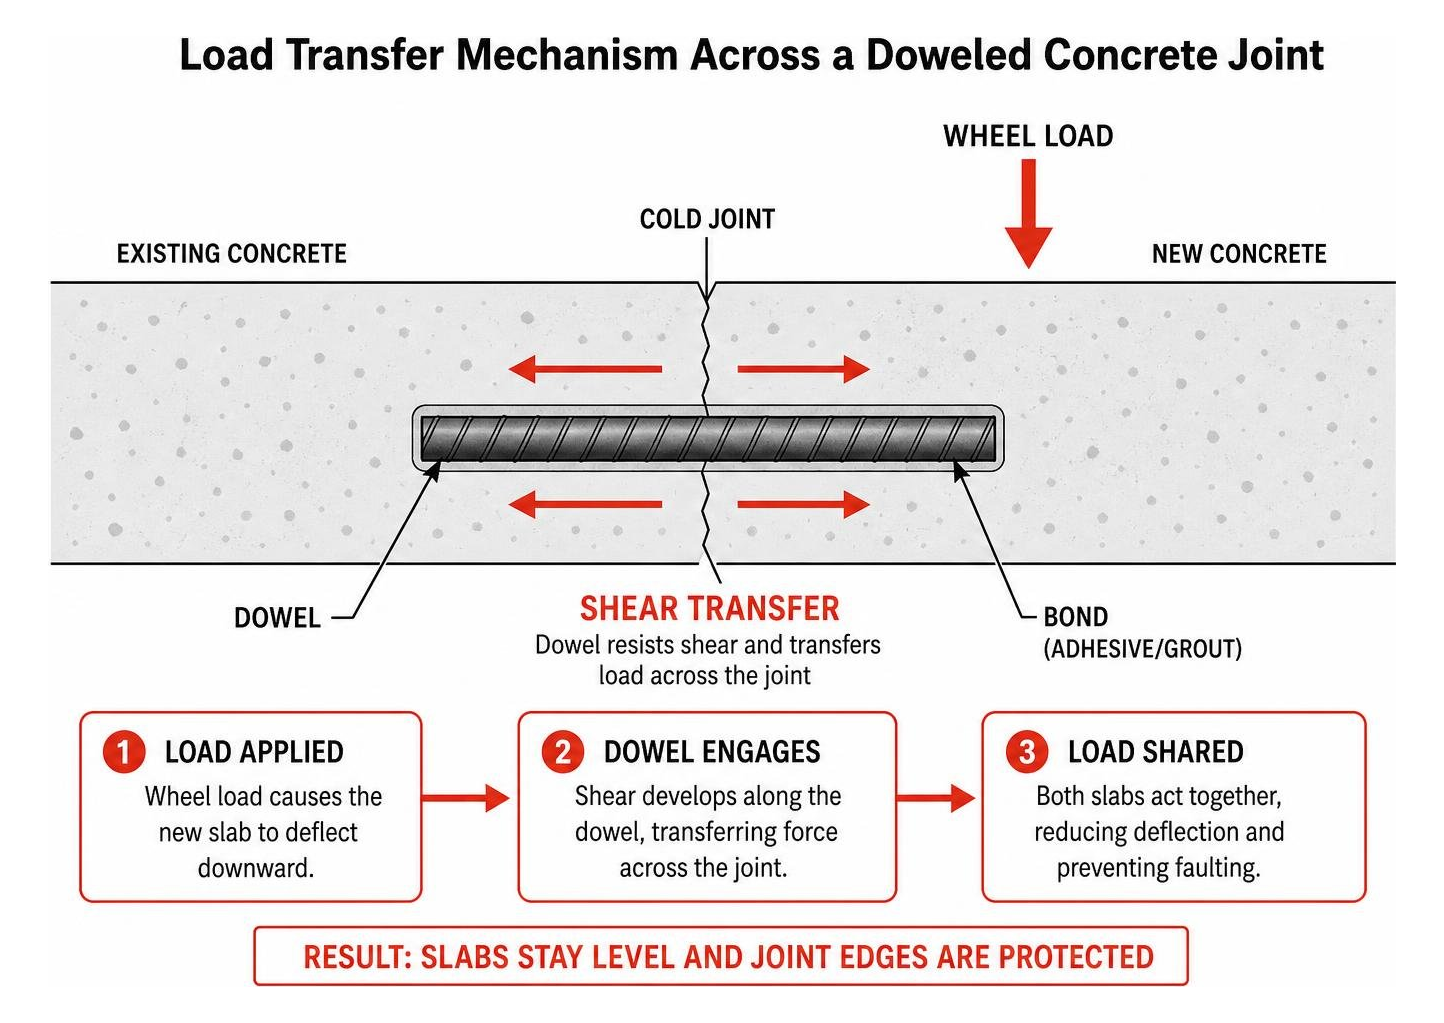
Dowels prevent this displacement by forcing the adjacent slabs to share the load. When properly installed, the steel dowels distribute traffic stresses across both slabs, protecting joint edges from crushing and spalling. Furthermore, choosing the correct types of reinforcement steel ensures your tie-in maintains structural continuity throughout decades of environmental wear.
Bonding Methods: Chemical Adhesives, Cementitious Grout, and Slip Dowels
Depending on whether a joint needs to be rigid or slip-capable, engineers specify different bonding methods:
- Epoxy Resins: Two-component pure epoxy systems provide top-tier bond strengths (achieving 17 to 18 MPa in high-strength concrete). They resist moisture and vibration, making them ideal for high-load anchoring and seismic tie-ins.
- Vinylester and Hybrid Resins: Fast-curing chemical adhesives well-suited for cold weather or damp environments where standard epoxies cure slowly.
- Cementitious Grout: A non-shrink grout mix (typically 1 part cement to 3 parts sand) pumped into oversized holes. Grout yields a lower bond strength (8 to 12 MPa) but remains a reliable, cost-effective method for massive civil foundations and structural extensions outlined in Item 00424 – Extending Concrete Structures.
- Slip and Plate Dowels: In rigid highway pavements and large floor joints, smooth round bars or diamond plate dowels are inserted with grease or plastic expansion sleeves on one side. This allows the new slab to contract naturally along its length while continuing to transfer vertical shear loads.
| Bonding System | Primary Application | Bond Strength | Movement Capability | Cure Time at 68°F (20°C) |
|---|---|---|---|---|
| Pure Epoxy Adhesive | Structural additions, foundation ties, tension dowels | 15 – 22 MPa | Rigid / Fully bonded | 12 – 24 hours |
| Vinylester / Hybrid | Fast-track anchoring, damp holes, seismic retrofits | 14 – 18 MPa | Rigid / Fully bonded | 30 – 90 minutes |
| Cementitious Grout | Large civil structures, oversized anchor holes | 8 – 12 MPa | Rigid / Fully bonded | 24 – 72 hours |
| Greased Slip Dowels | Pavement expansion joints, slab-on-grade repairs | N/A (Shear only) | Unbonded / Allows slip | Immediate (No adhesive) |
For deeper structural retrofitting background, consult the Retrofitting Reinforcement into Concrete Guide.
Engineering Specifications: Sizing, Spacing, and Embedment Depth
Getting the geometry right is non-negotiable. An undersized hole prevents adhesive from encapsulating the bar, while insufficient embedment risks concrete cone breakout under tension.
Always check rebar sizes and grades to match your project specifications. When planning material takeoffs, understanding how to calculate rebar for a slab will keep your layout accurate and code-compliant.
Embedment Depth and Edge Distance Rules
Under structural design codes like ACI 318, post-installed rebar subject to tension must meet strict embedment criteria:
- Standard Structural Embedment: Minimum embedment depth should be at least 15 times the bar diameter (15 times d_b) for typical loads.
- Seismic and High-Tension Applications: Embedment must increase to 25 times the bar diameter (25 times d_b) to develop the full yield strength of the steel without concrete breakout.
- Minimum Edge Distance: The drill hole center must remain at least 5 times the drill hole diameter (5 times d_h) away from any free edge or corner to prevent splitting during drilling or loading.
| Rebar Size | Nominal Diameter | Recommended Drill Bit Size | Standard Embedment (15 × Dia.) | Heavy-Duty / Seismic (25 × Dia.) | Min. Edge Distance (5 × Hole Dia.) |
|---|---|---|---|---|---|
| #4 (1/2″) | 0.500 in (12.7 mm) | 5/8 in (16 mm) | 7.5 in (190 mm) | 12.5 in (318 mm) | 3.1 in (80 mm) |
| #5 (5/8″) | 0.625 in (15.9 mm) | 3/4 in (19 mm) | 9.5 in (240 mm) | 15.6 in (398 mm) | 3.75 in (95 mm) |
| #6 (3/4″) | 0.750 in (19.0 mm) | 7/8 in (22 mm) | 11.25 in (285 mm) | 18.75 in (475 mm) | 4.4 in (110 mm) |
| #8 (1″) | 1.000 in (25.4 mm) | 1-1/4 in (32 mm) | 15.0 in (380 mm) | 25.0 in (635 mm) | 6.25 in (160 mm) |
Note: For standard residential non-structural flatwork slabs (4 to 5 inches thick), contractors often use a common field standard of #4 bars embedded 6 inches deep at 12-to-24-inch centers.
Thickness Considerations: Thin Slabs vs. Heavy-Duty Slabs
Drilling directly into the side of a thin concrete slab (3.5 to 5.5 inches) carries high risk. Rotary hammer action creates concussive shockwaves that easily spall or blow out the top and bottom concrete cover.
Maintaining adequate concrete slab rebar cover is essential for long-term corrosion prevention. For thin residential slabs, many engineers specify diamond plate dowels or a top saw-cut slot method. Instead of drilling into the edge, a vertical slot is cut across the top of the joint, the dowel is laid into the groove, and high-strength epoxy mortar fills the void. For slabs 6 inches and thicker, side drilling along the vertical centerline remains the standard approach.
Step-by-Step Installation of Post-Installed Rebar

Executing a clean, code-compliant dowel installation requires the right equipment:
- Tools: Rotary hammer drill (SDS-Plus or SDS-Max), carbide-tipped drill bits, depth stop gauge, high-pressure compressed air nozzle with extension, round wire bristle brushes matching hole diameter, manual or pneumatic dual-cartridge dispensing gun.
- Materials: Deformed rebar dowels (cut, deburred, and rust-cleaned), approved two-part chemical anchoring adhesive (such as PC-Concrete PRO High Strength Anchoring Epoxy), static mixing nozzles.
- PPE: N95 or HEPA respirator, eye protection with side shields, nitrile gloves, hearing protection.
Step-by-Step Guide for Doweling Rebar into Existing Concrete
- Scan for Embedded Steel: Use a cover meter or Ground Penetrating Radar (GPR) to locate existing steel reinforcement and conduits. Mark drill points to avoid striking embedded bars.
- Set Drill Depth: Attach a mechanical stop gauge to your rotary hammer to guarantee uniform depth across every hole.
- Drill Perpendicularly: Hold the drill perfectly square (90 degrees) to the concrete face. Tilting causes stress concentrations that weaken shear capacity.
The Blow-Brush-Blow Cleaning Protocol
A poorly cleaned hole reduces chemical bond strength by 50% to 80%. When drilling dust lines the hole wall, adhesive bonds to loose powder rather than solid concrete, dropping bond capacity from 18 MPa down to less than 4 MPa.
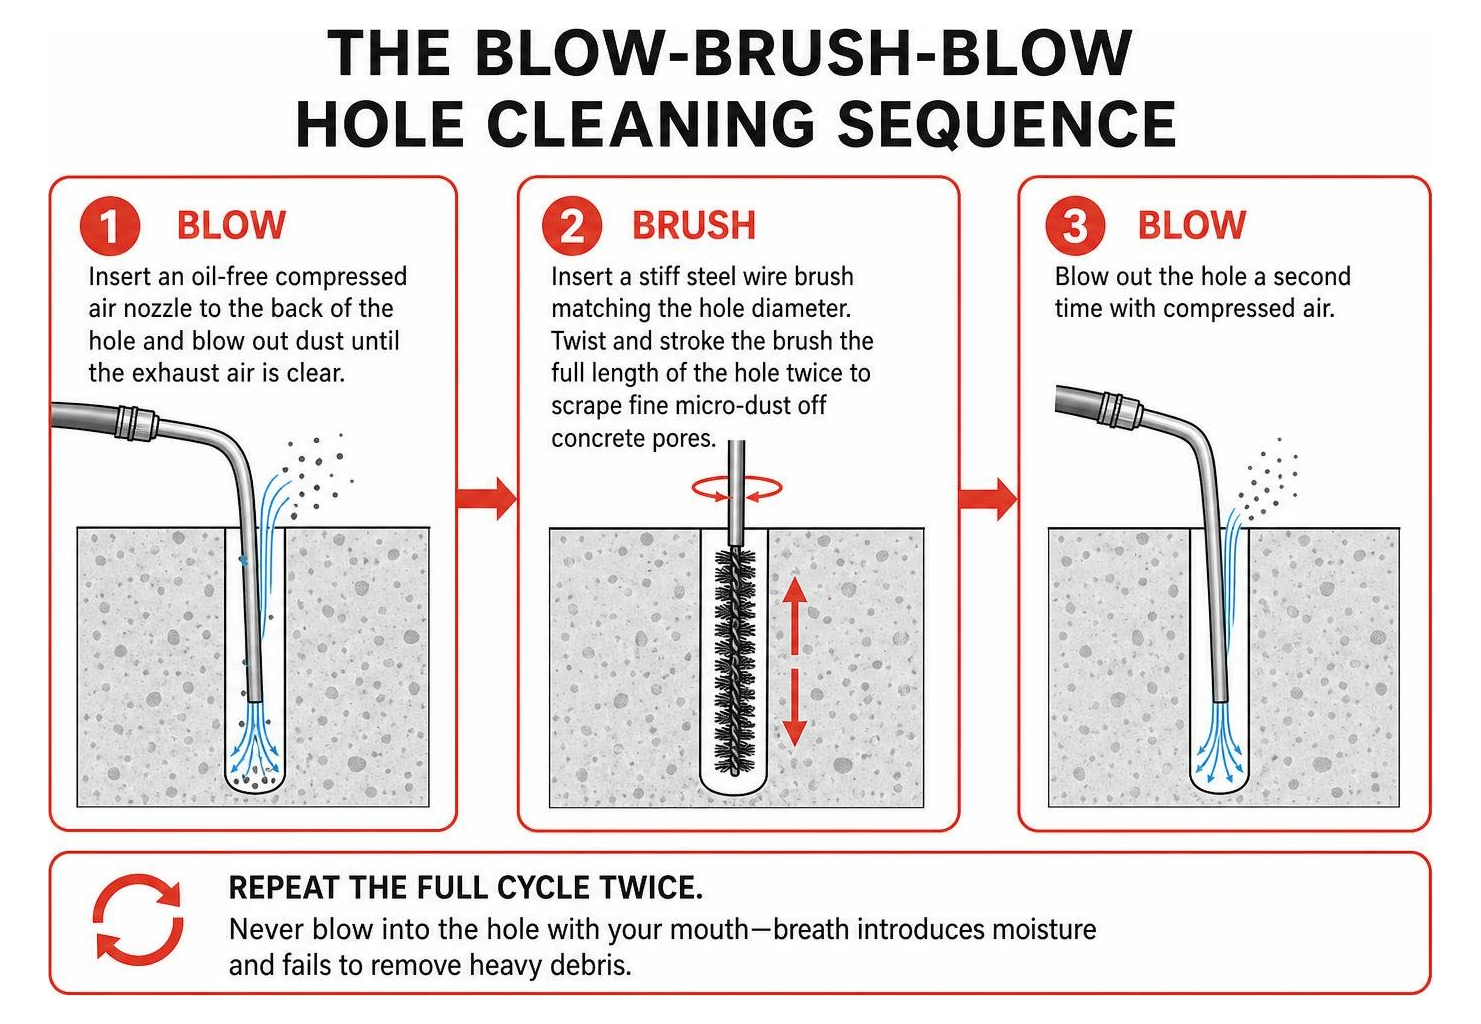
Follow the mandatory Blow-Brush-Blow procedure:
- Blow: Insert an oil-free compressed air nozzle to the back of the hole and blow out dust until the exhaust air is clear.
- Brush: Insert a stiff steel wire brush matching the hole diameter. Twist and stroke the brush the full length of the hole twice to scrape fine micro-dust off concrete pores.
- Blow: Blow out the hole a second time with compressed air.
- Repeat the full cycle twice. (Never blow into the hole with your mouth—breath introduces moisture and fails to remove heavy debris).
Adhesive Injection and Bar Placement
- Purge the Cartridge: Install the static mixing nozzle onto the adhesive cartridge and load it into the dispenser. Dispense the first 3 to 4 strokes onto scrap material until the epoxy emerges as a uniform, streak-free color.
- Inject from the Bottom: Insert the nozzle extension tube entirely to the bottom of the cleaned hole. Pull the trigger and steadily withdraw the nozzle, filling the hole approximately one-half to two-thirds full to prevent air pockets.
- Insert the Rebar: Push the clean rebar dowel into the hole while rotating it slowly. The rotation coats the rebar deformations and forces out trapped air. Epoxy should emerge around the hole rim, indicating complete encapsulation.
Curing Times and Reinforcement Support Setup
Adhesive cure times depend entirely on base concrete temperatures. At 68°F (20°C), a standard epoxy anchor requires roughly 24 hours for full cure, whereas at 40°F (5°C), curing can take 48 to 72 hours. Do not disturb or load the dowels during the cure window.
Once dowels are bonded, support the remaining reinforcement grid for your new pour. Choosing the right concrete rebar chair keeps your rebar mat elevated at the exact mid-depth specified by engineering plans.
Managing Concrete Shrinkage, Joint Movement, and Thermal Expansion
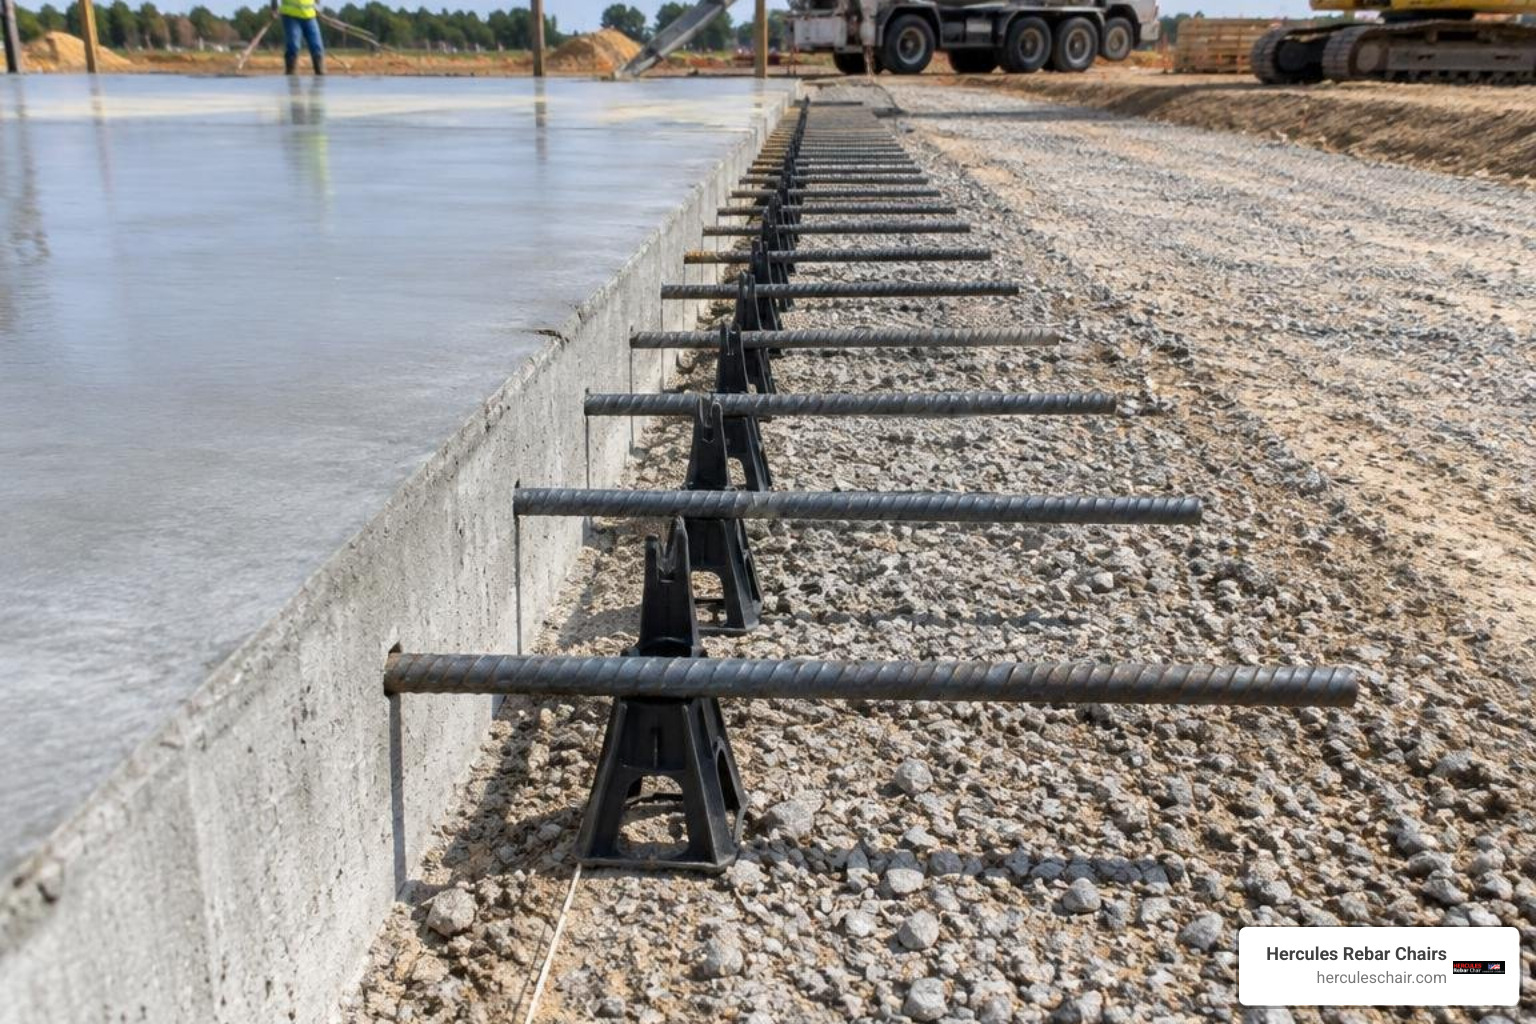
Fresh concrete shrinks as it cures and loses water—typically about 1/16 inch per 10 feet. When a new slab is chemically bonded to an immovable existing slab, shrinkage stresses accumulate along the joint. If the dowel layout is too rigid or placed too close to slab corners, cross-joint cracking is inevitable.
In addition to implementing foundation and slab design best practices, manage joint shrinkage through these strategies:
- Corner Offset: Stop the first dowel bar at least 6 to 12 inches away from outside slab corners to prevent diagonal shrinkage tears.
- Diamond Plate Dowels: Consider diamond-shaped steel plates set inside plastic pocket sleeves. They allow the slab to move horizontally in two directions (parallel and perpendicular to the joint) while locking vertical movement.
- Debonding Sleeves: For expansion joints, slip a smooth plastic sleeve over the free half of the dowel to allow lateral movement during temperature swings.
Critical Installation Mistakes and How to Avoid Them
- Skipping the Wire Brush: Simply blowing out a hole leaves a thin layer of concrete dust. Always use a wire brush to expose clean aggregate.
- Loading Before Full Cure: Walking on, bending, or pouring wet concrete against uncured dowels breaks the adhesive bond.
- Drilling Close to Unconfined Edges: Drilling closer than 5 hole diameters from a free corner causes edge breakouts.
- Misaligned Holes: Drilling dowels at random angles creates binding points in expansion joints, locking the joint and forcing concrete to crack nearby.
Working on large flatwork layouts requires efficient techniques; learning how to install rebar efficiently will keep your crew safe and productive on the job site.
Frequently Asked Questions about Concrete Doweling
What is the recommended embedment depth for post-installed rebar?
Under ACI standards, structural dowels transferring tension require a minimum embedment depth of 15 times the bar diameter for normal conditions, increasing to 25 times the diameter for seismic zones. For light residential slabs-on-grade, a standard rule of thumb is a 6-inch embedment depth for #4 bars.
When should you use grease instead of epoxy on dowel bars?
Use grease, lubricant, or plastic slip sleeves when creating a movement or expansion joint (such as in rigid concrete highway paving). Grease allows the new slab to freely expand and contract while maintaining vertical shear load transfer across the joint.
Can you install rebar dowels in wet or damp concrete?
Standard epoxies require clean, dry holes for maximum bond. However, specialized moisture-tolerant vinylester and structural hybrid adhesives are engineered and code-approved for installation in damp, water-saturated, or water-filled holes. Always check the manufacturer product data sheet before applying adhesives in damp substrates.
Conclusion
Doweling rebar into existing concrete turns separate, vulnerable concrete pours into a continuous, load-bearing assembly. Achieving durable results requires careful joint design, exact hole drilling, rigorous cleaning, and code-approved chemical adhesives.
Once your dowels are anchored and cured, maintaining proper elevation of the extending reinforcement grid is critical to project success. At Hercules Rebar Chairs (T.J. Harris Co.), we manufacture strong, reliable concrete supports for projects across the United States. Identifiable by our signature red color and backed by over 14 million units sold, our chairs save time and money on site while keeping your steel properly elevated for code-compliant concrete covers. Visit Hercules Rebar Chairs to equip your next concrete build with America’s #1 reinforcement supports.